Block Ads and Trackers on iOS
DNS level content blocking prevents your device from connecting to servers that serve you unwanted ads and that track you, which can minimise the amount of data you share with third parties. In this guide, you'll learn how to setup a DNS level content blocker to block Ads and Trackers across your iOS device.
DNS level content blocking prevents your device from connecting to known domains that will serve you unwanted ads and track you across all different apps and browsers on your device.
DNS or 'Domain Name System' is basically the 'phone book for the internet'. On the internet, all your requests to access websites are routed to IP addresses. Since IP addresses are sets of numbers and hard to remember, we usually address hosts by their much easier to remember host-name (e.g. privacyinternational.org).
As such, and because IP addresses can change, when your computer wants to access a server by its host-name, it asks a DNS server what the IP address for that host-name is at that moment, just like consulting a phone book, so that it can route the request correctly.
In this sense, DNS level content blocking makes use of known lists of unwanted servers - our blocklists - and purposefully give the ‘wrong address’ for domains that are on the blocklist so that your device can’t/won’t connect to those servers when it tries to.
The gold standard of protection is to set up your own pi-hole (and we have a guide on that too). On mobile devices, this is harder and while apps are available, their business models are still developing.
NextDNS is an example of a mobile application that uses DNS servers to block listed malware, spyware, ads, and trackers across all apps on your device based on their hostname (URL). In this guide, you will learn how to use NextDNS to setup DNS-level ad-blocking to block ads and trackers across your mobile apps and browser.
Installation
To install NextDNS, visit its Apple App Store page, click on Get, and confirm by clicking Install when prompted.
Setup
Now that NextDNS is installed, you need to configure it to start blocking ads. For this, you will need to choose which blocklists from NextDNS's list you would like to use.
NextDNS gives you two options to go through this setup:
1 - You can go to https://my.nextdns.io/ which will create a temporary account for you and from here you can choose your blocklists. Because the account is temporary this means you won't have possibility of going back and adjusting your settings later on. You can, instead, create new temporary accounts and thus select new sets of blocklists whenever you need to by opening the link above on a private window in your browser.
2 - You can create an account on https://my.nextdns.io/signup and this will allow you to go back and edit your blocklists and save preferences whenever you'd like to. In creating an account you will be asked to provide an email address and a password (see NextDNS's privacy policy here).
At the time of PI testing NextDNS, we found that your email address was not being used for user/account verification. Additionally, if you don't want to give away your personal e-mail you could use e-mail privacy services such as those that generate disposable email addresses.
Both these options will eventually bring you to the same setup screen.
To setup a blocklist, go to the Privacy tab and then click on Add a blocklist. The website will show all the blocklists you can enable (Fig. 2)
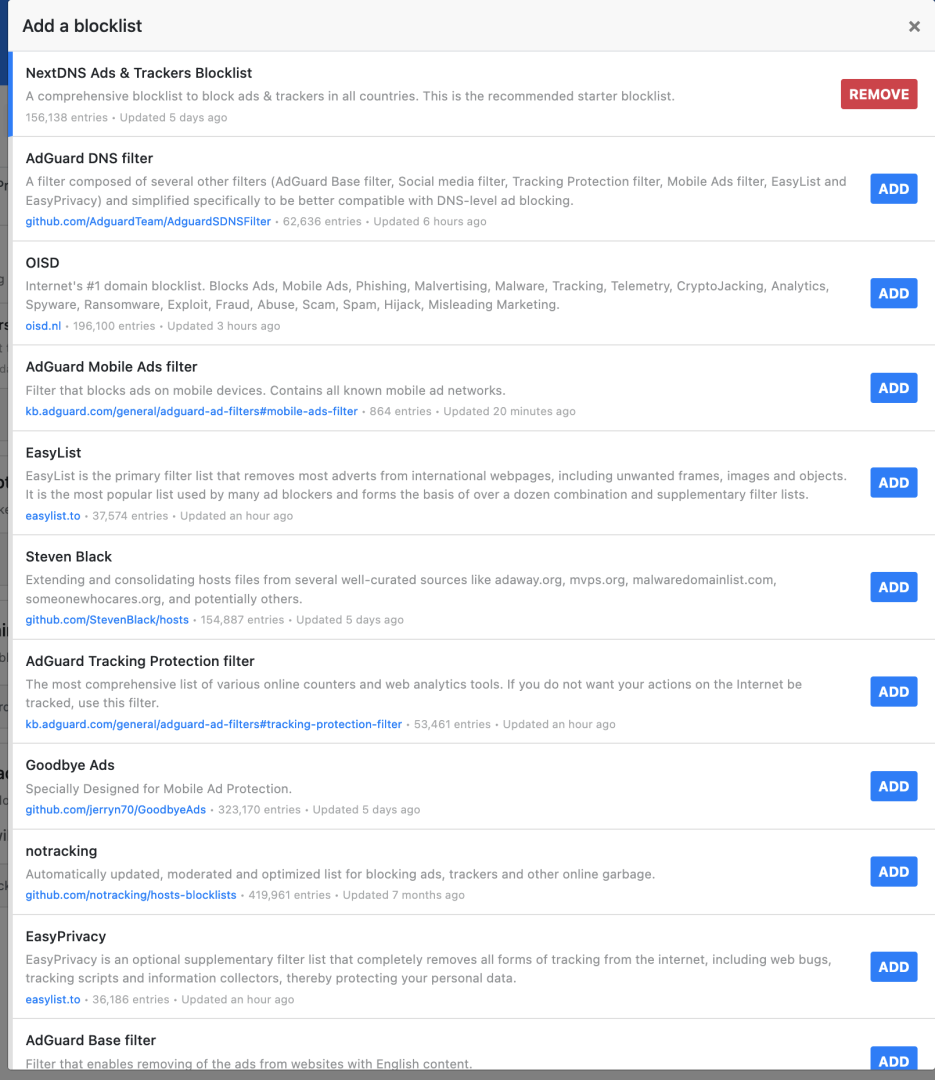
Note: Making use of open source and open lists means you can see what the blocker will and won't block. Open lists are often community-driven and updated frequently.
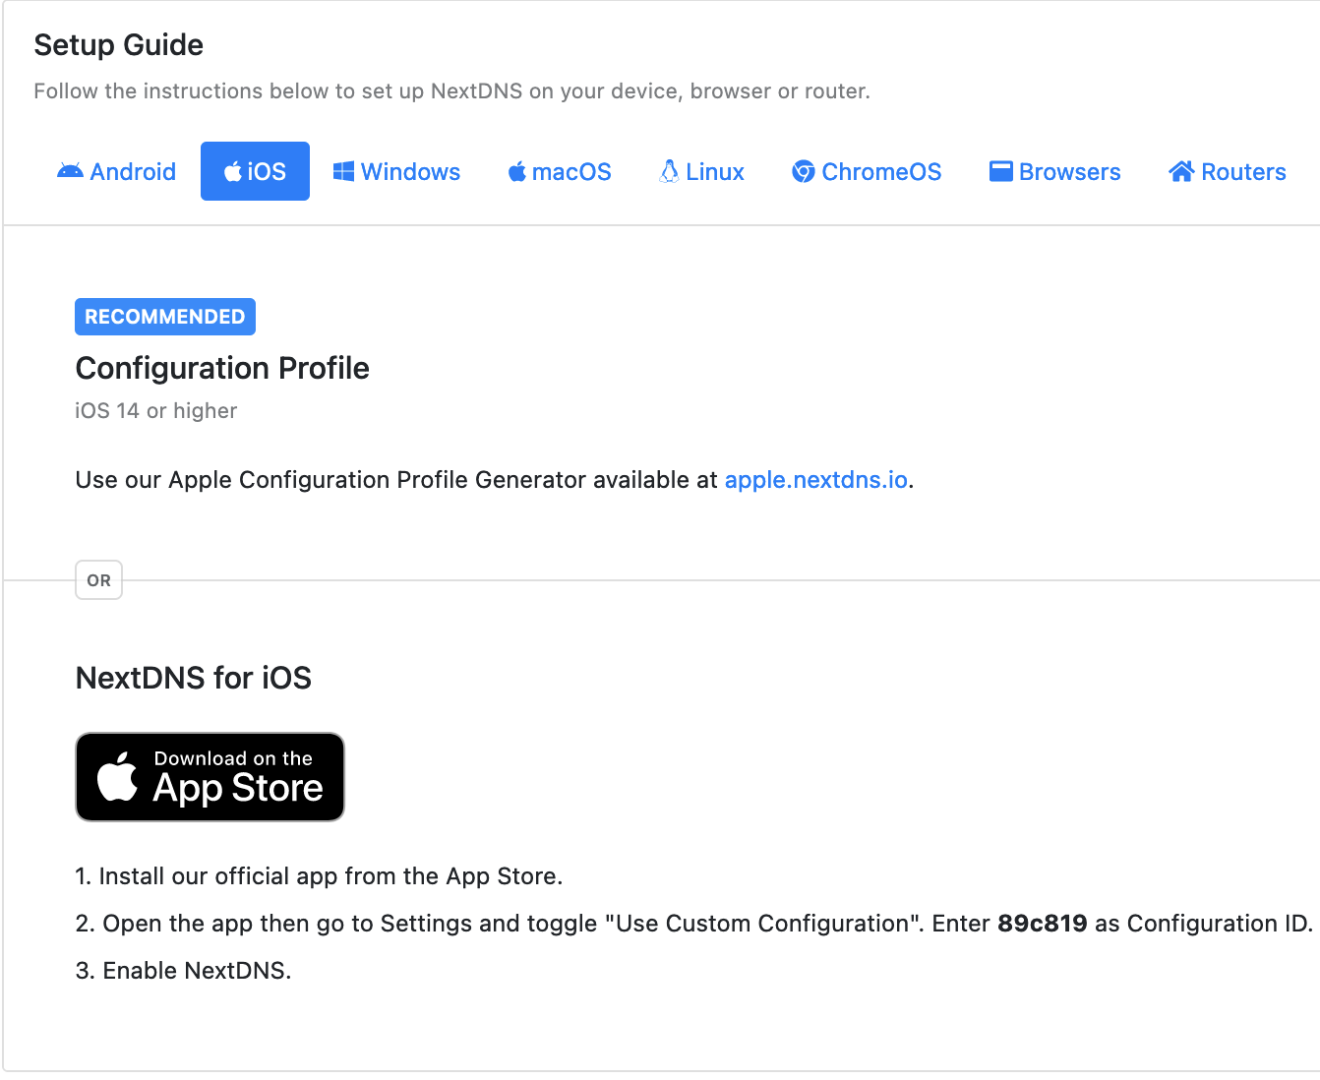
Each account, temporary or not, will have a configuration ID associated with it. To apply your custom configuration to your phone, click on Preferences in the app status bar menu and go to the Configuration tab. Then toggle "Use Custom Configuration" and enter your custom configuration ID. If you have trouble finding your Configuration ID or anywhere else follow the instructions in the Setup tab (Fig. 3).
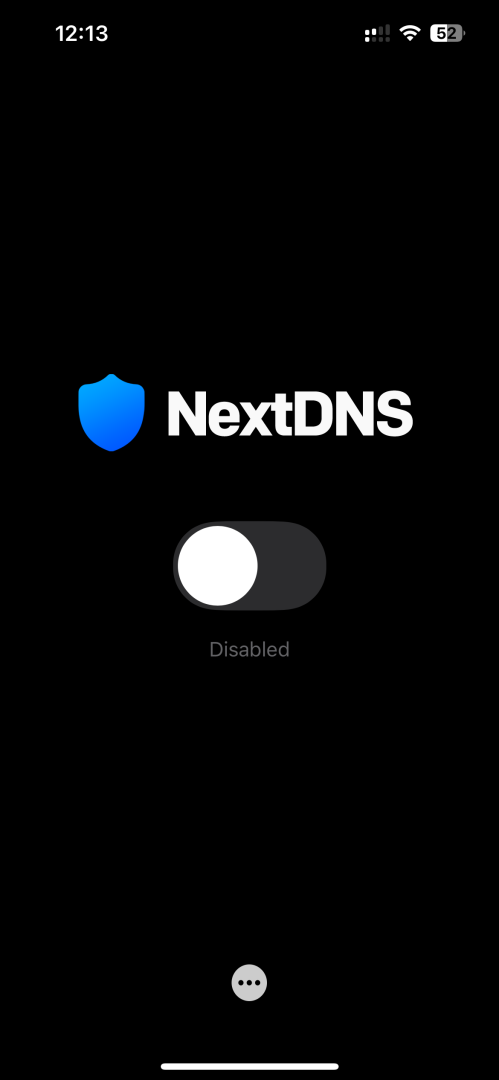
After your ID has been input you can go back to the homepage on your NextDNS app and click the large button to enable NextDNS (Fig. 1).
Now your device should start blocking ads and trackers from the blocklisted domains you've selected. To learn more about NextDNS and its advanced features, visit its official website.
Note: DNS level content blocking is a very simple form of ad blocking, which is both a strength and a weakness. On one side, it is very easy to set up and does much more than blocking ads, as it will additionally block trackers, malicious and suspicious domains, pop-ups that would come from domains on the blocklist. Its downside is that it is a coarse form of content blocking, meaning it will either block a domain entirely, or it won't. In practice this means that in situations where the content you want to access and the content you want to block come from the same subdomain, DNS level blocking won't be able to distinguish between them. This is the case with 'first-party advertising/tracking' done by websites like YouTube, Facebook or Instagram.
Found a mistake? An outdated screenshot? Think this could be improved? Check out our Github repository and contribute to help keep these guides up-to-date and useful!