Setup and run Pi-Hole on a Raspberry Pi
Blocking ads and trackers on your devices typically requires manual labour on each individual device (e.g. installing an ad-blocker on your browser, another on your phone, and another on your tablet). In this guide you'll learn how to install and setup Pi-Hole, a general purpose network-wide ad-blocker, on a Raspberry Pi to block ads on any device connected to your home network.
Overview
Pi-hole is a general purpose network-wide ad-blocker that protects your network from ads and trackers without requiring any setup on individual devices. It is able to block ads on any network device (e.g. smart appliances), and, unlike browser add-ons, Pi-hole blocks ads on any type of software.
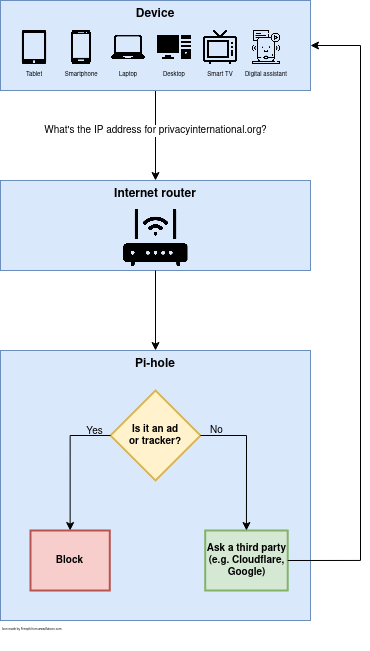
The general setup works as follows (Fig. 1). You install Pi-hole on your server (in this case, we're using a Raspberry Pi) and assign it a static IP address. On your router, you set the DNS primary server to the Pi-hole IP address. When a device connects to your home network, it gets the Pi-hole IP address as its main DNS server from your router. When your device looks up the address for a hostname, it contacts the Pi-hole. If the host is an ad or tracker and present in the list used, the request is instantly blocked. Otherwise, the lookup is performed on some upstream server of your choice (e.g. OpenDNS, Cloudflare, GoogleDNS, your ISP).
Prerequisites
To deploy Pi-hole on your home network, make sure you have all of the following:
- A Raspberry Pi with at least 512MB of RAM (all Raspberry Pi versions satisfy this requirement) and Raspbian installed.
- An SD-card with at least 2GB of free space.
- Internet connection on your Raspberry Pi. Either via Wi-Fi (if available) or via Ethernet cable.
- Access to your router's administration panel[^1].
[^1]: This is usually available in home networks. Check your router's documentation for instructions and credentials.
Installation
Disclaimer: This guide is based on the official Pi-hole documentation but might not be up to date. This guide is more about giving an understanding of what pi-hole does and how you might want to configure it than a strict step by step guide. For up to date instructions on how to install and any specific issue please refer to the official documentation.
If you're starting with a fresh Raspberry Pi, start by installing Raspbian according to the Raspberry Pi documentation. Then, be sure to install git with the following command:
sudo apt install git
To install Pi-hole, you'll clone its git repository and run the install script.
git clone --depth 1 https://github.com/pi-hole/pi-hole.git Pi-hole
cd "Pi-hole/automated install/"
sudo ./basic-install.sh
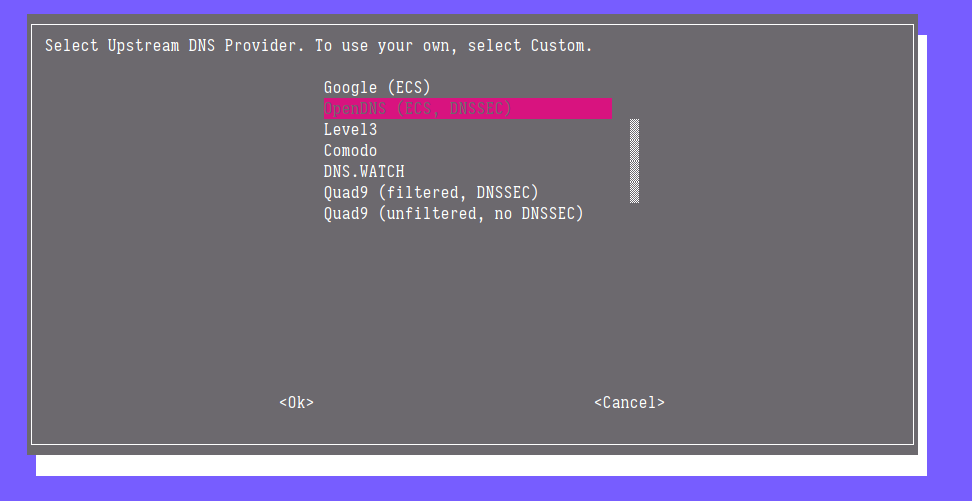
The script will guide you through the installation steps and ask for your input to configure basic settings. Any settings you configure during installation can be updated later. At some point, it asks you to select an upstream DNS provider (Fig. 2). This is the server on which lookups of non-blocked hostnames will be performed.
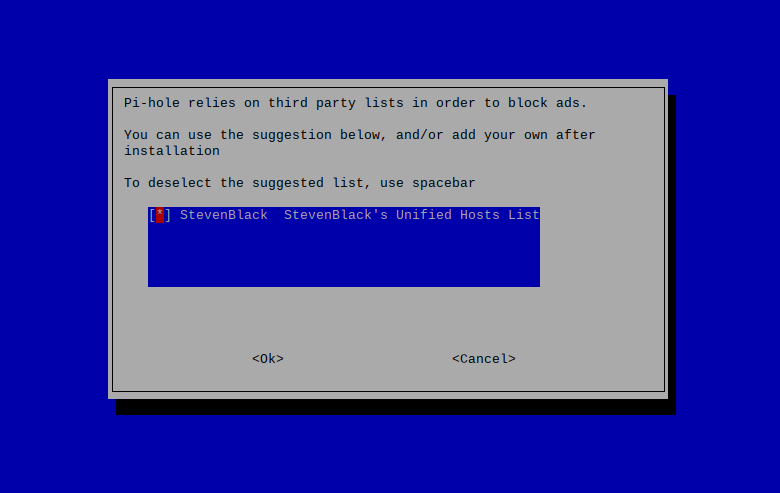
Then, it will ask you to select an adlist. We suggest you leave the default on (Fig. 3). Later, you'll be able to add more lists, including custom ones, if you wish to.
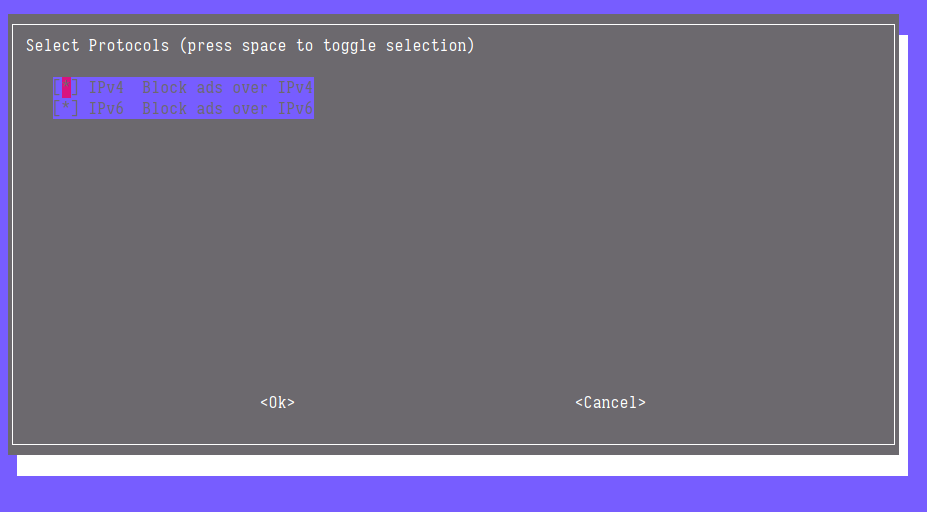
Pi-hole is able to block ads on IPv4 and IPv6. Unless you have a specific reason to disable any of those protocols, you can leave both on (Fig. 4).
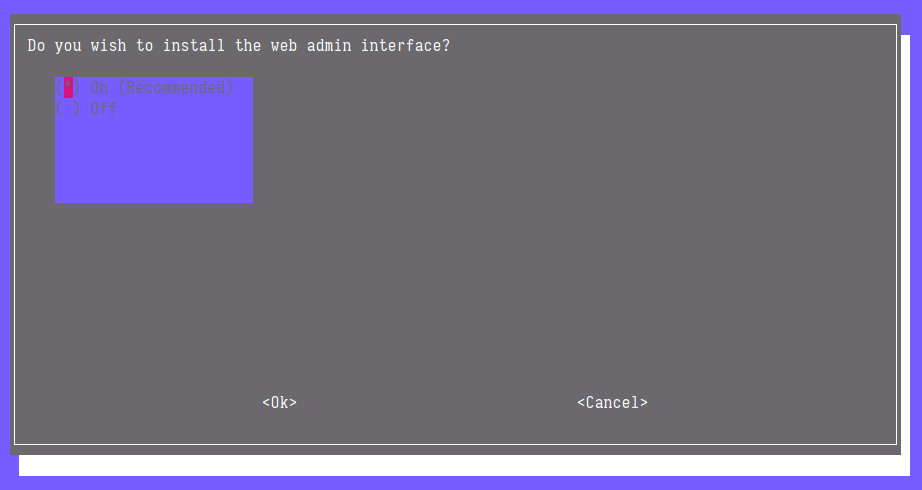
It also includes a web interface which you can access to manage your Pi-hole instance. If you're comfortable with command line usage, you can skip the web interface (and server) installation. Otherwise, we suggest you install it (Fig. 5), as well as the corresponding web server (Fig. 6).

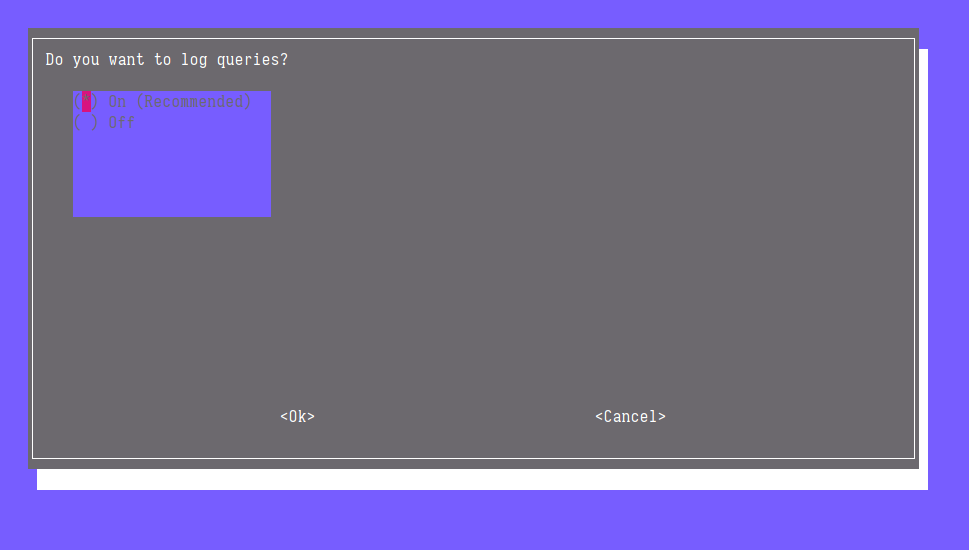
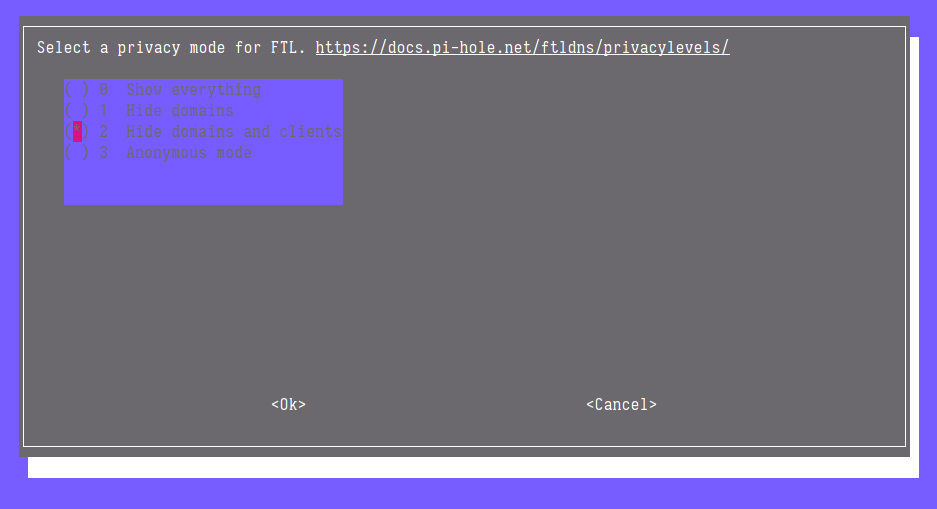
You can choose to log the queries answered by your Pi-hole (Fig. 7), and set a privacy level dictating which kind of logs are stored (Fig. 8). If you're sharing your Pi-hole instance with other people, beware that logs may leak private information (that will be visible to you), so choose your privacy levels accordingly.
When the installation is finished, you'll get a summary message that includes the IP addresses of your Pi-hole and the randomly generated admin password (Fig. 9). Be sure to save this somewhere (either screenshot or pen & paper) as you'll need it later.
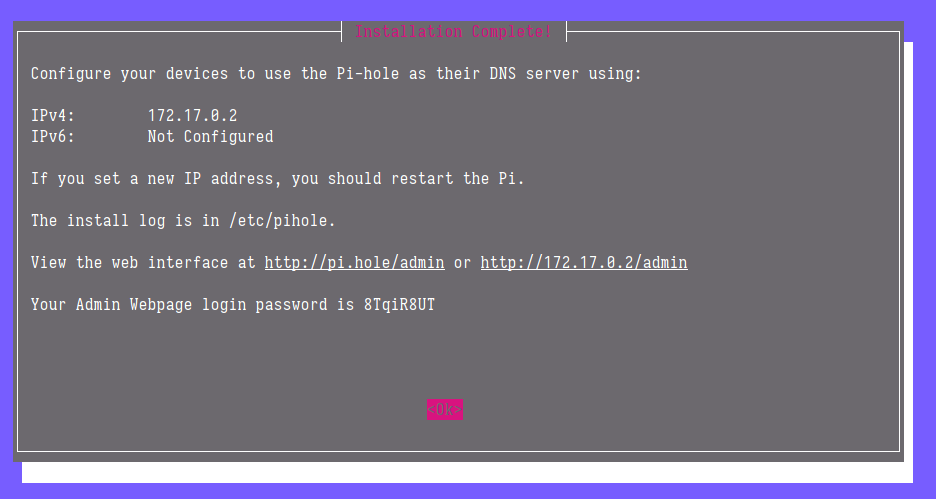
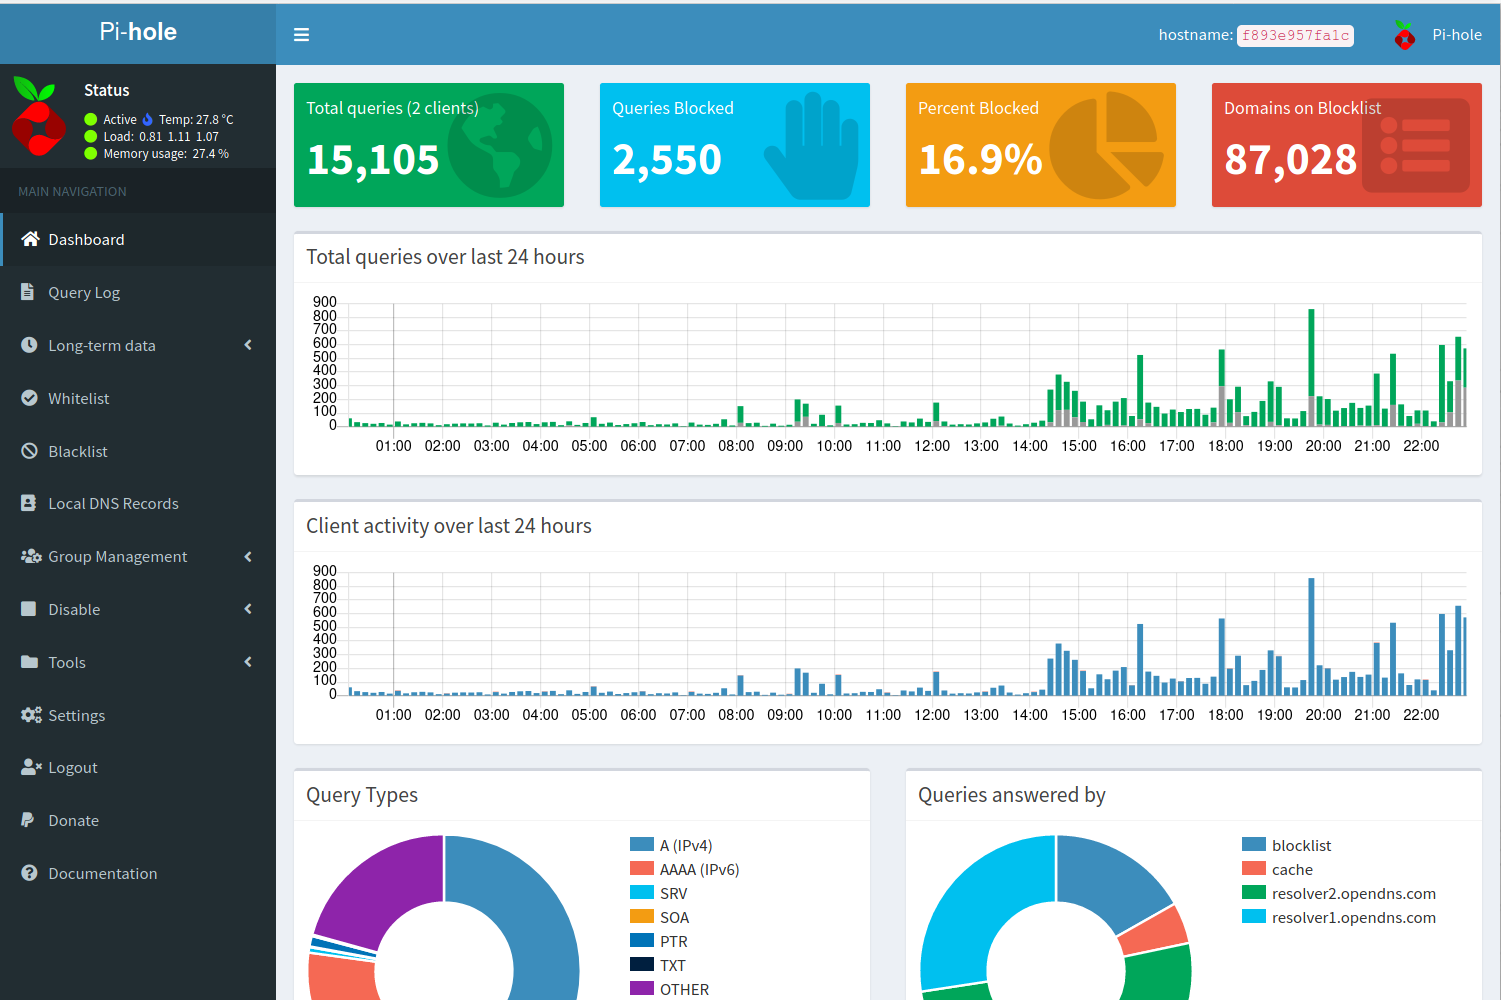
Click OK to conclude the installation. To be sure the installation succeeded, open a web browser and go to http://IP_ADDRESS/admin, where IP_ADDRESS is the IPv4 address of your Pi-hole device (Fig. 9). Note that the http://pihole/admin only works after you setup your device to use the Pi-hole DNS server. Click on log-in and enter your (randomly-generated) password. You should now be in the Pi-hole admin panel (Fig. 10).
Setup
Now that you have Pi-hole installed, the last step is configuring your network to use Pi-hole as its DNS server
The preferred method for doing this is to change your router's DNS server and point it to the Pi-hole IP address, ensuring any client that connects to your network receives the Pi-hole as its DNS server. Typically this requires you to access the router's administration panel. There, you should have a field to set the primary and secondary DNS servers. Set the primary address to the Pi-hole's IP address, and reset any open network connection you may have on your devices. Now, when you connect to your home network, you should get the Pi-hole as the DNS server.
However, some routers do not allow you to change the DNS settings. In this case, you can set the Pi-hole as your DHCP server (and in doing so, you need to disable your router's own DHCP server). Refer to the official Pi-hole documentation to learn how to do so.
Found a mistake? An outdated screenshot? Think this could be improved? Check out our Github repository and contribute to help keep these guides up-to-date and useful!