Block Ads and Trackers on Android
DNS level content blocking prevents your device from connecting to servers that serve you unwanted ads and that track you, which can minimise the amount of data you share with third parties. In this guide, you'll learn how to setup a DNS level content blocker to block Ads and Trackers across your Android device.
DNS level content blocking prevents your device from connecting to known domains that will serve you unwanted ads and track you across all different apps and browsers on your device.
DNS or 'Domain Name System' is basically the 'phone book for the internet'. On the internet, all your requests to access websites are routed to IP addresses. Since IP addresses are sets of numbers and hard to remember, we usually address hosts by their much easier to remember host-name (e.g. privacyinternational.org).
As such, and because IP addresses can change, when your computer wants to access a server by its host-name, it asks a DNS server what the IP address for that host-name is at that moment, just like consulting a phone book, so that it can route the request correctly.
In this sense, DNS level content blocking makes use of known lists of unwanted servers - or blocklists - and purposefully gives the ‘wrong address’ for domains that are on the blocklist so that your device can’t/won’t connect to those servers when it tries to.
The gold standard of protection is to set up your own pi-hole (and we have a guide on that too). On mobile devices, this is harder and while apps are available, their business models are still developing.
Rethink is an example of a free and open-source mobile application that uses DNS servers to block listed malware, spyware, ads, and trackers across all apps on your device*. In this guide, you will learn how to use Rethink to setup DNS-level ad-blocking to block ads and trackers across your mobile apps and browser.
*At the time of creating this guide, this is Rethink's approach to logging for free accounts.
Installation
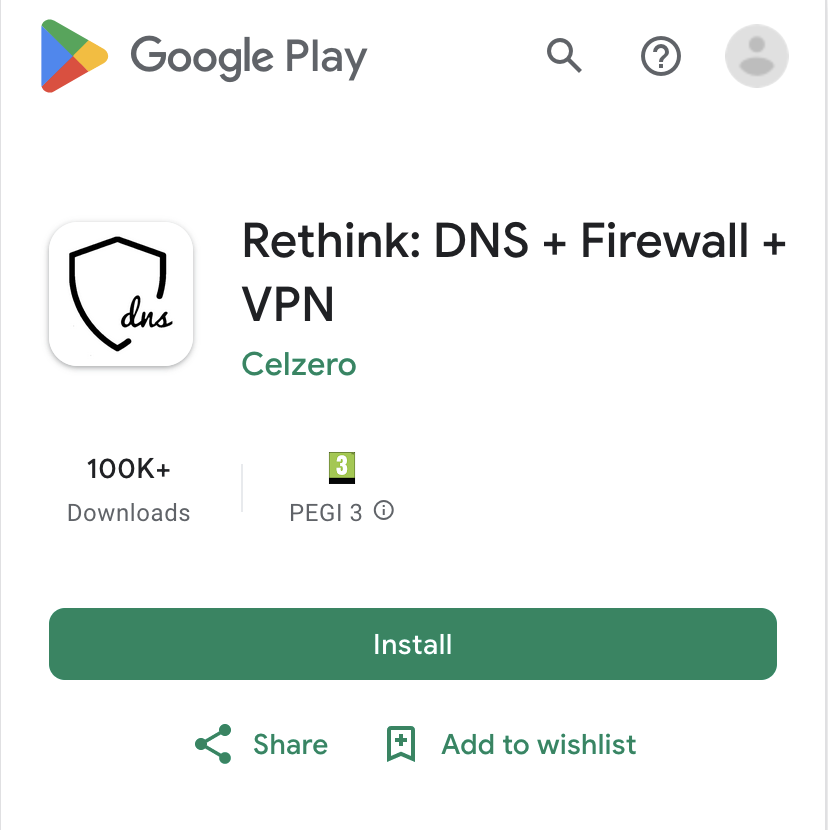
To install Rethink, visit its Play Store page and click on Install (Fig. 1).
Setup
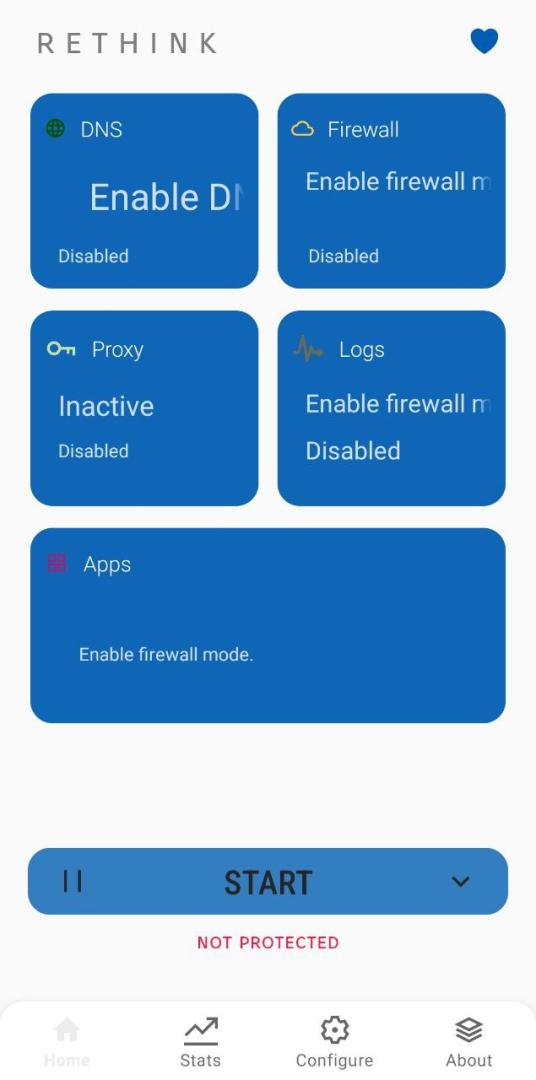
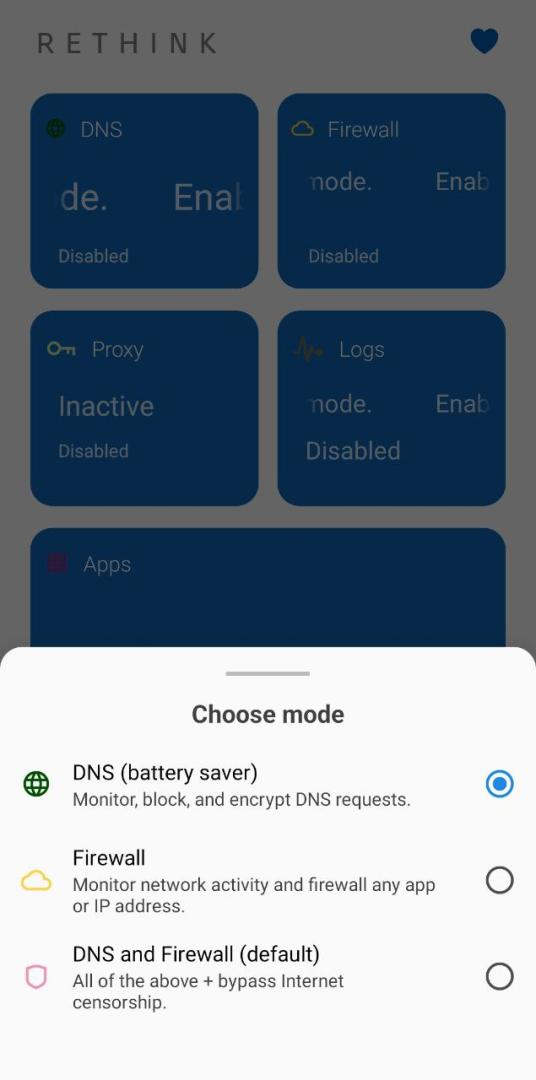
After Rethink is installed, you can open it by clicking on the icon or clicking on Open in the Play Store. By default, Rethink is configured to setup both DNS and Firewall. In order to block ads, it is enough to setup DNS. Unless you have a specific need for a firewall, you can leave it off, as this may unintentionally block regular traffic on your device, which may affect your browsing experience or Internet-connect apps. To change the default mode, click the arrow next to the Start button (Fig. 2) and then choose the first option, DNS (Fig. 3). To enable Rethink, click the Start button.
Once Rethink is running, it will route all DNS requests performed by your device (even in apps) through a DNS server of your choosing, and show you an overview of its activity (Fig. 4). It also allows you to setup blocklists for specific hostnames you want to block. This means that, if an app tries to track you by sending your data to the hostname evil-tracker.org, you can block the hostname in Rethink and the app is unable to send data (since the host can not be found), effectively protecting your device against this form of digital tracking.
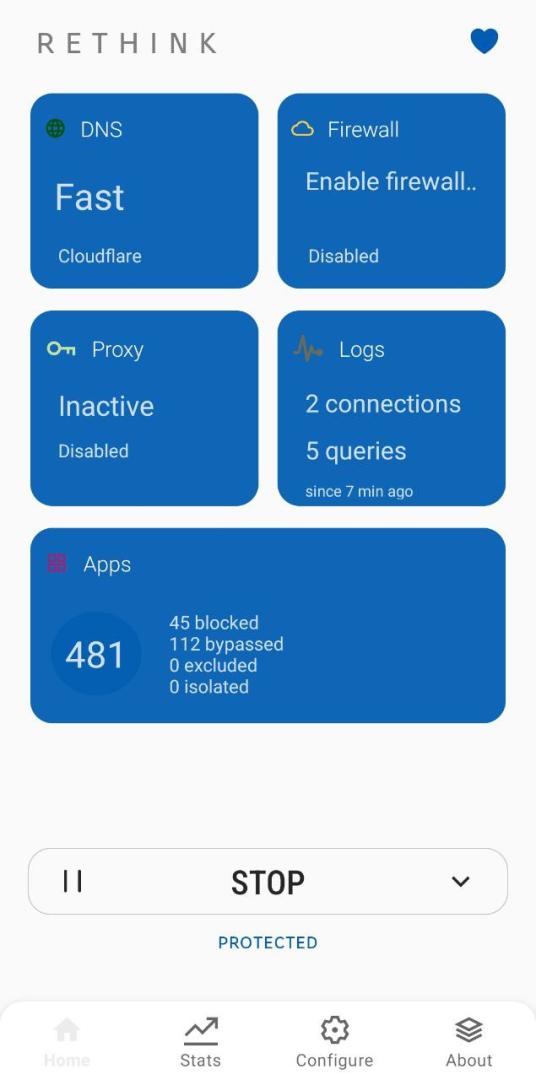
To configure the DNS settings, click the DNS card in the main screen. In this page (Fig. 5), you can change the DNS server (i.e. the one answering requests from your device), and configure blocklists you want to use.
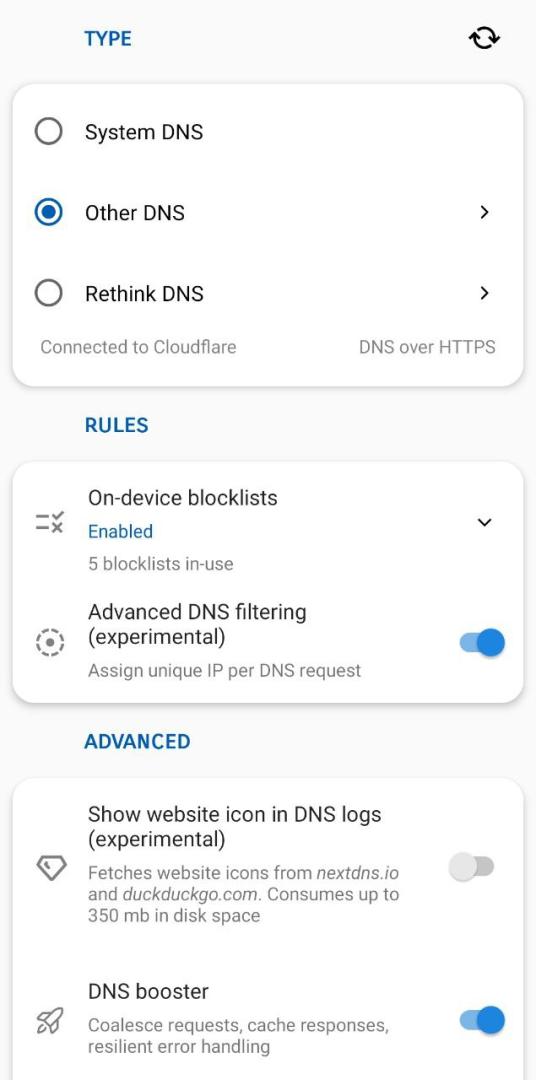
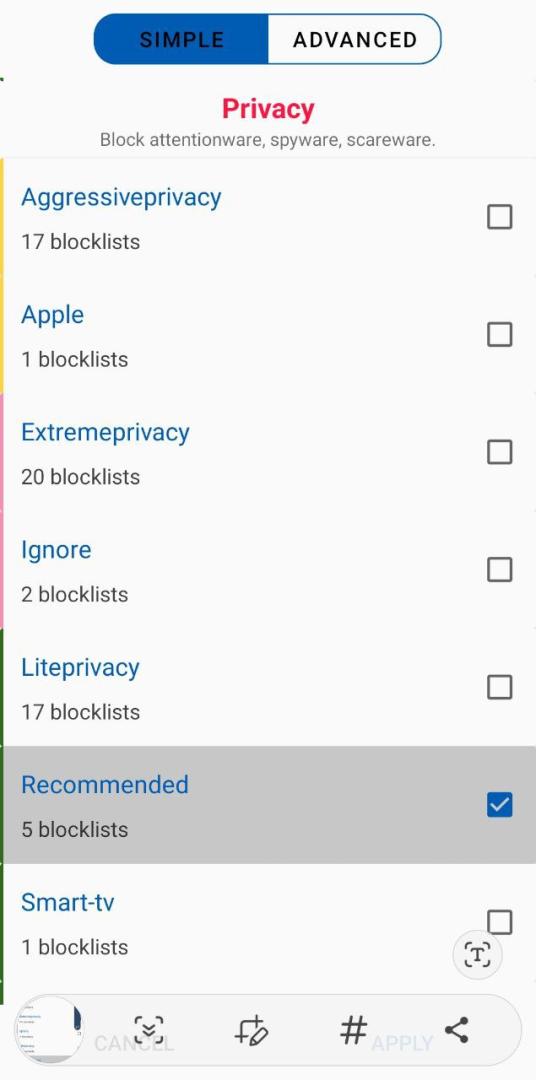
To configure blocklists, which are disabled by default, click the On-device blocklists option and then click on Disabled. This will prompt you to download blocklists that you can later enable. Click on Download blocklists to proceed. After the download finishes, you are shown a screen with categorized blocklists. To find privacy-related lists, scroll down to the Privacy section. We suggest you enable, at least, the Recommended lists. Finally, click Apply to save your changes.
Note: Making use of open source and open lists means you can see what the blocker will and won't block. Open lists are often community-driven and updated frequently.
After enabling blocklists, your device should start blocking ads and trackers immediately. You can check this in the home screen of Rethink, in the Apps card (Fig. 2). To learn more about Rethink and its advanced features, visit its official website.
Note: DNS level content blocking is a very simple form of Ad blocking, which is both a strength and a weakness. On one side, it is very easy to set up and does much more than blocking ads, as it will additionally block trackers, malicious and suspicious domains, pop-ups that would come from domains on the blocklist. Its downside is that it is a coarse form of content blocking, meaning it will either block a domain entirely, or it won't. In practice this means that in situations where the content you want to access and the content you want to block come from the same subdomain, DNS level blocking won't be able to distinguish between them. This is the case with 'first-party advertising/tracking' done by websites like YouTube, Facebook or Instagram.
Found a mistake? An outdated screenshot? Think this could be improved? Check out our Github repository and contribute to help keep these guides up-to-date and useful!